The Essential Guide to Changing Guitar Strings: Tune Up Your Sound!
Changing guitar strings is a fundamental skill that every guitarist should learn. Whether you're a beginner or an experienced player, regular string changes are necessary to maintain optimal sound quality and playability. In this comprehensive guide, we'll walk you through the step-by-step process of changing guitar strings, offering valuable tips and tricks along the way. So grab your favorite guitar and let's dive into the world of string replacement!
-
Why Change Guitar Strings? Over time, guitar strings lose their brightness, become dull, and accumulate dirt, sweat, and oils from your fingers. These factors can contribute to a decrease in sound quality and intonation, as well as hinder your playing experience. Changing your strings regularly helps maintain a consistent tone, sustain, and overall performance.
-
Gathering the Right Tools: Before you begin the string changing process, make sure you have the necessary tools at hand. These include a set of new guitar strings (appropriate for your guitar type), a string winder, wire cutters, and a guitar tuner. Having all the tools readily available will make the process smoother and more efficient.
-
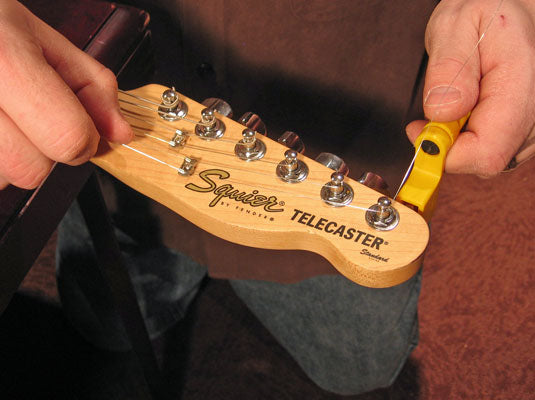
Removing the Old Strings: Start by loosening the tension of the old strings. Use the string winder to turn the tuning pegs counterclockwise, gradually lowering the tension until the string is loose enough to remove. Once loose, use the wire cutters to carefully cut the strings near the bridge. Remove each string one at a time, being cautious not to scratch the guitar's body or damage any components.
-
Cleaning the Guitar: With the old strings removed, take the opportunity to clean your guitar. Use a soft cloth or microfiber cloth to wipe away any accumulated dirt or grime on the fretboard, body, and hardware. This will help maintain the overall condition and longevity of your instrument. You may also want to apply to some lemon oil to fingerboard (unless it's maple). Apply a few drops and wipe down with a shop towel. This will keep the wood conditioned and looking great!
-
Installing the New Strings: Unpack your new set of strings and identify the appropriate string for each position on the guitar. Starting with the thickest string (low E), insert it into the bridge and pull it through the corresponding tuning peg. This process will vary slightly depending on your guitars bridge type. Some guitars have a "string-through-body" bridge where the string will actually be inserted from the back of the guitar and pulled through the top. Acoustic guitars typically use bridge pins to hold the strings in place. Leave about 2 inches of slack in the string, and then wind the string around the peg, ensuring it wraps neatly and securely by keep downward pressure on the string. It is important that the string winds around the peg in the correct direction! If you're tuning pegs are arranged "3 On A Side", then all of the strings should come off the "inside" of the tunning peg heading towards the nut. If you have a "6 In Line" arrangement like a stratocaster, then all strings should come of the bottom side of the tuner. Stretching and Tuning: After installing the new strings, they will need to be stretched and properly tuned. Begin by gently pulling each string away from the fretboard, applying light tension to help settle the strings. This process helps minimize future tuning instability. Once stretched, use your guitar tuner to accurately tune each string, starting from the low E and progressing to the high E. Repeat the tuning process until all strings are in tune.
-
Stretching and Tuning: After installing the new strings, they will need to be stretched and properly tuned. Begin by gently pulling each string away from the fretboard, applying light tension to help settle the strings. This process helps minimize future tuning instability. Once stretched, use your guitar tuner to accurately tune each string, starting from the low E and progressing to the high E. Repeat the tuning process until all strings stay in tune.
-
Post-String Change Adjustments: Depending on the guitar type, you may need to make additional adjustments after changing the strings. Electric guitars may require minor intonation adjustments using the bridge saddles, while acoustic guitars might benefit from a truss rod adjustment to maintain proper neck relief. If you're unsure about these adjustments, it's advisable to consult a professional guitar technician.
Conclusion: Changing guitar strings is an essential skill for every guitarist. By following the step-by-step process outlined in this guide, you can maintain optimal sound quality, playability, and overall enjoyment of your instrument. Remember to regularly change your strings, keep your guitar clean, and perform any necessary adjustments to ensure your guitar performs at its best. So go ahead, pick up that guitar, and experience the rejuvenating power of fresh strings!